
Why Your DIY RV Parking Pad Shouldn’t Be One-Size-Fits-All
If you’re planning to park your RV at home, you already know you need something tougher than a patch of lawn and smarter than a boring slab of concrete. But here’s what most people don’t realize: your ideal RV parking pad should match your RV, your backyard, and even your local weather.
A lightweight travel trailer doesn’t need the same support as a massive Class A motorhome. Parking in Arizona’s dry heat isn’t the same as parking through a rainy Oregon winter. And if you’re putting in the work to build it yourself, you deserve a base that’s strong, stable, and made to last.
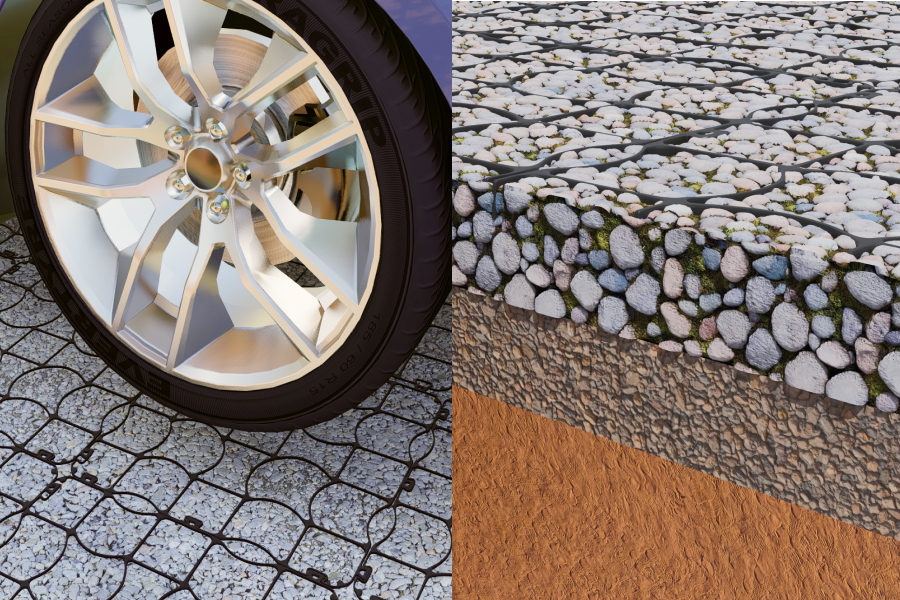
That’s where PaveCore gravel grids come in — a DIY-friendly solution that lets you create a customized parking pad without the hassle, high cost, or heavy equipment of pouring concrete. Whether you’re leveling a space for weekend adventures or building a long-term RV base camp, we’ll show you how the right foundation makes all the difference.
Choosing the Right Pad for Your RV Type
Before you break ground, it’s important to match your parking pad to the type of RV you own. Different rigs put different pressures on the ground — and building the right base from the start will save you headaches (and money) down the road.
Travel Trailers and Teardrops (Lightweight Rigs)
If you’re parking a smaller travel trailer, pop-up camper, or teardrop, you’re in luck. These lighter rigs don’t need an ultra-heavy-duty base. A well-prepared gravel grid surface will easily handle the load without risk of sinking or ruts.
DIY Tip:
Compact the sub-base (about 2 inches of crushed stone) before laying your PaveCore grids for maximum stability.

Class A Motorhomes and Super C’s (Heavyweight Rigs)
Big rigs bring big weight — and that means you need serious support under your tires. Without a strong base, even reinforced concrete can crack over time. PaveCore grids are engineered to lock gravel into a solid surface that distributes weight evenly, eliminating sinking or shifting.
DIY Tip:
Plan for at least 4 inches of compacted sub-base material if you’re parking a heavy Class A or Super C.
5th Wheels and Toy Haulers (Mid- to Heavyweight Rigs)
5th wheels and toy haulers often have large footprints and can be tricky when it comes to turning and backing into place. These movements can quickly tear up loose gravel — but PaveCore locks everything in, so the surface stays stable even with regular use.
DIY Tip:
Widen the pad by a few feet on each side for easier maneuvering without damaging the surrounding ground.
Why Your Climate Matters, Too
The perfect RV pad isn’t just about the weight — it’s also about the weather. PaveCore grids outperform concrete or loose gravel across all climates because they’re permeable and flexible — two things traditional pads can’t match.
Here’s a quick guide to what matters depending on where you live:
| Region | Climate Challenge | How PaveCore Helps |
| Southwest (AZ, NM, TX) | Dust, extreme heat | Stabilizes gravel, prevents dust blowout |
| Southeast (FL, GA) | Heavy rains, flooding | Superior drainage prevents washouts |
| Northeast (VT, NY) | Freeze-thaw cycles, frost heave | Flexible design withstands ground shifts |
| Pacific Northwest (OR, WA) | Constant rain, soggy soil | Permeable structure drains moisture fast |
DIY Tip:
Always check for slope and drainage before you build. Even the best pad needs a way for water to flow away.
Quick Recap
- Choose the right base depth based on your RV’s weight.
- Plan for your local climate and drainage needs.
- Use PaveCore gravel grids to create a strong, flexible foundation that lasts and minimizes the required amount of gravel.
How to Build Your DIY RV Parking Pad with PaveCore Gravel Grids
Installing your RV parking pad yourself isn’t just doable — it’s one of the best ways to save money and customize the space exactly how you want it. With the right prep work and the right materials, you can have a strong, stable pad ready in a weekend.
Here’s everything you’ll need to get started.
Materials Checklist
- PaveCore gravel grid panels
- Crushed stone or gravel (for base material). A #57 stone works well
- Fine decorative gravel (for grid infill). A ¼” minus works well.
- Backyard Bases Commercial Geotextile fabric
- Shovel, rake, and wheelbarrow
- Plate compactor (rental recommended)
- Rubber mallet
- Stakes and string (for layout)
- Level and measuring tape
Pro Tip:
Order 10–15% more gravel than your measurements suggest. It covers compaction and unexpected low spots.
Step-by-Step DIY Installation Guide
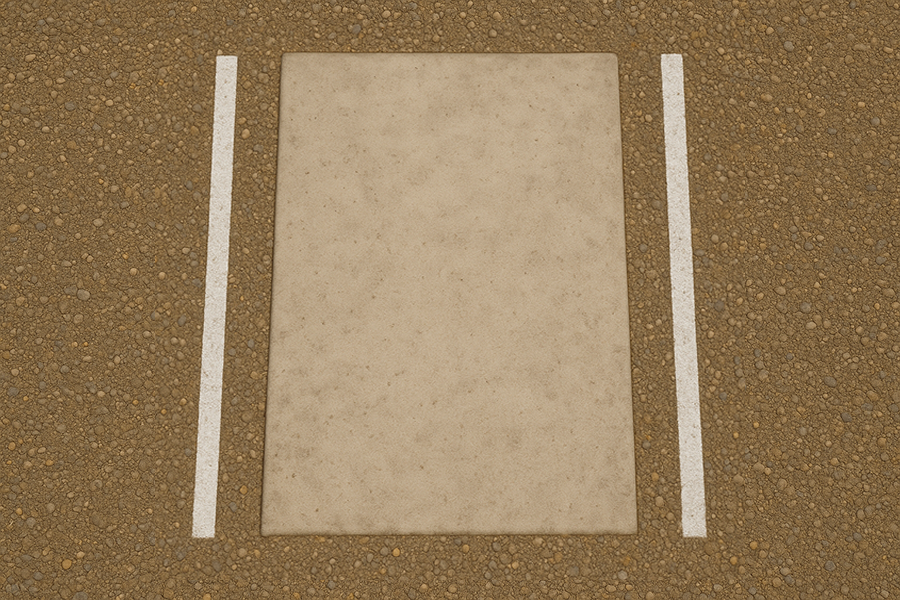
Step 1: Plan and Mark the Area
- Measure the dimensions of your parking pad based on your RV size, plus extra space for easy access.
- Use stakes and string to outline the area clearly.
Tip Box:
Add Extra Room:
Design your pad to be at least 2–3 feet wider and longer than your RV. This makes parking and future upgrades much easier.
Step 2: Excavate and Prepare the Sub-Base
- Excavate the area to the proper depth:
- 4–6 inches for smaller trailers.
- 6–8 inches for heavy Class A rigs.
- Maintain a slight slope (1–2%) to allow water drainage.
Step 3: Lay and Compact the Base Material
- Spread a layer of crushed stone evenly across the base.
- Use a plate compactor to compact in thin layers (2–3 inches at a time) until firm and level.
Tip Box:
Compact in Layers:
Rushing through compaction leads to future sinking. Take your time for a pad that lasts.
Step 4: Install BYB Geotextile Fabric
- Roll out the commercial grade fabric for ensuring the fill material doesn’t get pushed into your subbase over time or with the RV weights
Step 5: Lay the PaveCore Grids
- Start at one corner and lay out PaveCore grids over the compacted base.
- Interlock panels securely.
- Tap into place gently with a rubber mallet.
Step 6: Fill the Grids
- Fill the grids completely with fine gravel or decorative stone.
- Rake to level.
- Lightly compact the surface again for final stabilization.
Step 7: Final Touches
- Install border edging if desired. We recommend the BYB Corten Steel Pound in Place Edging.
- Clean up loose material around the edges.
- Step back and admire your work — your backyard just leveled up!
Start Building Your Perfect RV Parking Pad
Build it once. Build it right.
Ready to create a strong, lasting RV parking base that fits your rig, your yard, and your climate?
Shop PaveCore gravel grids today and start your backyard upgrade!
Common Mistakes to Avoid When Building an RV Pad
Mistake #1:
Skipping proper compaction of the base layer — it leads to ruts and sinking over time.
Mistake #2:
Underestimating gravel needs — always over-order by at least 10%.
Mistake #3:
Forgetting about water drainage — flat pads cause puddles and long-term damage.
Quick Facts About PaveCore RV Parking Pads
- Maximum Load Capacity: Up to 60,000 lbs per square foot (depending on base prep).
- Recommended Base Depth: 2 inches for small RVs, 4 inches for heavy Class A rigs.
- Installation Time: Most DIY installs can be completed in 1 day.
- Water Drainage: 100% permeable design eliminates puddles and runoff.
- Maintenance: Occasional top-up of gravel infill and light raking as needed.
- Lifespan: 20+ years with proper installation and occasional maintenance.
- Best Gravel Size: 1/4″ to 5/8″ angular gravel for best grid lock-in and drainage.
- Climate Resistance: Performs in freeze-thaw cycles, heavy rains, heat, and drought.
Pro Tip:
Choosing angular gravel (instead of round river rock) creates a stronger, interlocked surface inside the grids.
Frequently Asked Questions (FAQ)
Can I install a PaveCore RV pad without heavy equipment?
Yes. Most DIYers can complete the project using basic landscaping tools and a rented plate compactor. No need for concrete mixers, rebar, or heavy construction equipment.
How much gravel do I need?
Gravel needs vary based on the depth of your base and infill. A general rule is:
- Base Layer: 1 ton of crushed stone covers about 100 square feet at 2 inches deep.
- Grid Infill: About 1 ton of finer gravel fills roughly 150–200 square feet of PaveCore grid.
Always order 10–15% extra for best results.
Can I use PaveCore for a dual-purpose space (RV pad and patio)?
Absolutely. Many homeowners design PaveCore pads that double as attractive patios, driveways, or seating areas when the RV is away. Simply choose decorative gravel that fits your backyard style.
What happens if I park on it during heavy rain?
PaveCore’s permeable design allows rainwater to drain straight through the surface, preventing puddles and soft spots. Unlike concrete or solid pavers, it won’t trap standing water.
Do I need to secure the edges?
Edging is optional but highly recommended. It keeps the gravel neatly contained, enhances the finished look, and adds long-term durability to your pad.
Can I install PaveCore on a slight slope?
Yes, PaveCore grids can be installed on slight slopes. However, proper sub-base preparation and compaction are critical to maintaining stability on uneven ground.
Your RV deserves a parking pad that’s as rugged as your adventures.
Build it right the first time with PaveCore — strong, smart, and made for DIYers who want more than just a parking spot.
Shop PaveCore grids now and start your next project.