
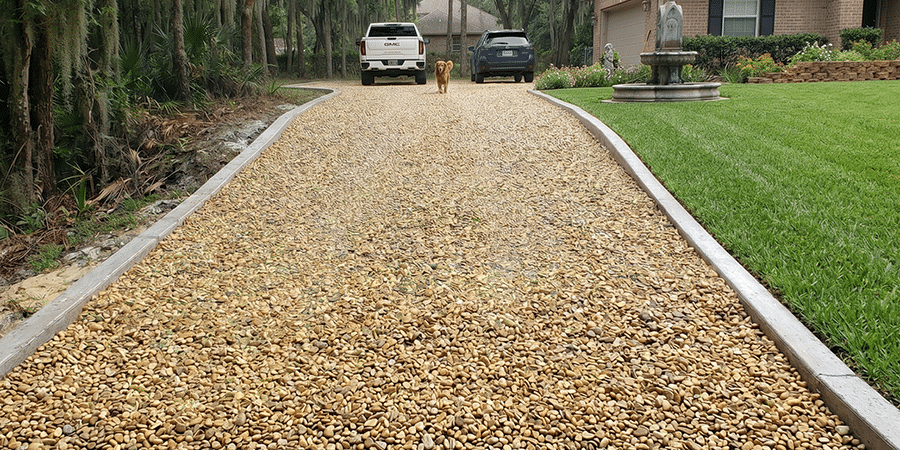
The average homeowner with a gravel driveway spends $300–$600 every few years adding more stone, re-grading ruts, and filling washout channels — only to watch the same erosion patterns reappear after the next heavy rain. It’s a frustrating cycle that feels inevitable, but it isn’t.
The most effective driveway erosion control combines three elements: a geotextile fabric layer to stabilize weak soil, a geocell grid system to lock gravel in place and prevent lateral migration, and proper grading that directs water off the surface. This approach addresses all three root causes of driveway failure — weak subgrade, unconfined aggregate, and poor drainage — in a single weekend install.
At Backyard Bases, we’ve helped thousands of homeowners solve this problem permanently with our BaseCore HD™ geocell ground grid system. This guide will show you exactly why your driveway keeps eroding, how cellular confinement technology stops it, and the step-by-step process to stabilize your driveway yourself — no concrete, no contractors, no recurring repairs.
Why Your Driveway Keeps Eroding: The Three Root Causes
Before you can fix driveway erosion, you need to understand why it happens. Every washout, rut, and gravel migration pattern traces back to one or more of three engineering failures. Identifying which ones affect your driveway determines which solution will actually work.
Root Cause #1: Weak or Saturated Subgrade
What it looks like: Soft spots that sink under tire weight, mud pumping up through the gravel after rain, and depressions that fill with standing water.
Why it happens: The native soil beneath your driveway can’t support vehicle loads when it’s wet. Clay soils are especially problematic — they hold water, expand when saturated, and compress unevenly under weight. Every time you drive over a soft spot, you push gravel down into the mud and bring soil up to the surface.
Adding more gravel on top of a weak subgrade is like laying carpet over a rotten subfloor. The surface looks better temporarily, but the underlying problem remains. Within months, the new gravel sinks into the same soft spots.
Root Cause #2: No Lateral Confinement
What it looks like: Gravel spreading sideways into your lawn, tire ruts that grow wider over time, and loose stones scattered along the edges of your driveway.
Why it happens: Loose aggregate has nothing holding it in place. When your tires roll over gravel, the stones want to move sideways — that’s basic physics. Without a confinement system, every vehicle pass pushes stones outward, creating deeper ruts and thinner coverage in the wheel paths.
This is why re-grading your driveway provides only temporary relief. You’re putting the same unconfined material back in place, and it immediately starts migrating again under the next vehicle load.
Root Cause #3: No Water Management
What it looks like: Channels carved down the center or edges of your driveway, gravel washed to the bottom of slopes, and sediment deposits where water pools.
Why it happens: Water follows the path of least resistance. If your driveway doesn’t have proper crown (a slight center peak that sheds water to the sides) or adequate drainage at the edges, water flows down your driveway instead of off it. Moving water carries loose gravel with it, cutting erosion channels that deepen with every storm.
According to the USDA Natural Resources Conservation Service, even low-grade slopes of 2–3% can generate enough water velocity during heavy rain to move aggregate. Without surface drainage built into your driveway design, erosion is inevitable.
Why Typical Fixes Fail
Understanding these three root causes explains why the common DIY responses don’t work long-term:
- Adding more gravel: Treats the symptom, not the cause. New stone sinks into weak subgrade and migrates without confinement.
- Re-grading with a box blade: Redistributes existing material without solving subgrade, confinement, or drainage issues.
- Pouring concrete: Solves lateral migration but creates new problems — cracking from freeze-thaw cycles, poor drainage, and high installation cost.
- Asphalt overlays: Same cracking issues as concrete, plus ongoing maintenance costs and eventual resurfacing needs.
Effective driveway erosion control must address all three root causes simultaneously. That’s where geocell technology comes in.
How Geocell Technology Stops Driveway Erosion
A geocell is a cellular confinement system — think of a honeycomb grid that you fill with aggregate. Each cell locks gravel in place, preventing lateral migration while still allowing water to drain through. When combined with geotextile fabric underneath, the system addresses all three root causes in a single installation.
How BaseCore HD™ Solves Each Root Cause
Weak subgrade: The geotextile fabric installed beneath the geocell creates a separation layer between your native soil and the aggregate. This prevents mud from pumping up into the gravel and stops stones from sinking into soft spots. The fabric also distributes vehicle loads across a wider area, reducing point pressure on weak soil.
No lateral confinement: BaseCore HD™ geocell walls physically contain the aggregate within each cell. When your tire rolls over the surface, the gravel can’t spread sideways — it’s locked in place by the cell walls. This eliminates rutting, stops edge migration, and maintains even surface coverage year after year.
No water management: Unlike solid surfaces, a geocell-stabilized driveway remains fully permeable. Water drains vertically through the aggregate and into the ground below, rather than flowing across the surface and eroding channels. The geotextile fabric allows water through while preventing soil from washing up — it’s a one-way valve for drainage.
Why This Approach Outperforms Concrete
Concrete driveways solve the lateral confinement problem but create new issues. Solid surfaces don’t drain — water sheets off and erodes whatever is adjacent. Freeze-thaw cycles crack rigid slabs. Installation requires forms, rebar, mixing, and curing time.
A BaseCore HD™ driveway offers comparable load-bearing capacity without these drawbacks. The cells distribute weight across multiple contact points, the permeable surface eliminates runoff problems, and the flexible grid moves with minor ground shifts instead of cracking.
For homeowners in areas with expansive clay soils, freeze-thaw cycles, or high water tables, geocell provides structural stability that rigid surfaces can’t match.
Ready to stop the erosion cycle? Explore driveway solutions at Backyard Bases or call 888-897-2224 for help sizing your project.
Step-by-Step: How to Build an Erosion-Resistant Driveway
This DIY installation process works for new driveways or rebuilding an existing one that’s failed. Most homeowners complete a 10′ × 50′ driveway (500 sq ft) in a single weekend. Here’s exactly how to do it.
Tools and Materials You’ll Need
Tools:
- Shovel and rake
- Wheelbarrow
- Plate compactor (rent from any equipment rental shop — typically $60–$80/day)
- Utility knife for trimming geocell and fabric
- String line and stakes for grading
- Tape measure
Materials from Backyard Bases:
- 3″ BaseCore HD™ or 4″ BaseCore HD™ geocell panels (3″ for standard vehicles, 4″ for trucks and heavy loads)
- Geotextile fabric — order enough to extend 6″ beyond your driveway edges
- BaseEdge HD steel edging — optional but recommended for clean borders
Materials from local suppliers:
- Crushed stone aggregate: ¾″ minus or crusher run works best. Calculate 1.5 tons per 100 sq ft for a 3″ geocell, 2 tons per 100 sq ft for 4″ depth.
- For detailed aggregate selection, see our gravel types and sizes guide.
Step 1: Excavate and Grade (2–4 hours)
Remove existing loose gravel if rebuilding, or excavate to a depth of 4–6 inches below your desired finished surface for new construction. The goal is to reach stable subgrade soil and create room for fabric, geocell, and aggregate.
Grade the excavated surface with a 2% crown — the center of your driveway should be approximately ½″ higher than the edges per foot of width. For a 10′ wide driveway, the center sits about 2.5″ higher than the sides. This subtle crown sheds water sideways instead of letting it run down the driveway length.
Compact the native soil with your plate compactor. Make at least two passes in overlapping rows.
Step 2: Install Geotextile Fabric (30 minutes)
Roll out geotextile fabric across the entire excavated area. Overlap seams by 6–12 inches. Extend the fabric 6″ beyond your planned driveway edges — you’ll trim or bury this later.
The fabric creates a separation barrier between your native soil and the aggregate. It prevents soft soil from pumping up into the gravel and stops aggregate from sinking into mud during wet conditions.
Step 3: Expand and Position Geocell Panels (1–2 hours)
Remove BaseCore HD™ panels from packaging and expand each one to its full honeycomb shape. Each panel covers approximately 64 square feet when fully expanded.
Position panels on top of the geotextile fabric, starting at one end of your driveway. Connect adjacent panels using the integrated tabs or BaseClips for a secure connection.
Trim panels to fit curves or irregular shapes using a utility knife. The HDPE material cuts easily.
For detailed visual guidance, see our complete gravel driveway installation guide.
Step 4: Fill Cells with Aggregate (3–5 hours)
Shovel or wheelbarrow crushed stone into the expanded geocell panels. Fill each cell level with the top of the cell walls, then add an additional ½″–1″ of overfill on top.
Work in sections. Fill a 4′ × 8′ area completely before moving to the next section — this prevents accidentally collapsing unfilled cells by walking on them.
The overfill layer provides a smooth driving surface and accounts for initial compaction settling.
Step 5: Compact the Surface (1–2 hours)
Run your plate compactor over the entire filled surface. Make at least three passes in overlapping rows, changing direction between passes (lengthwise, then crosswise, then diagonally).
Compaction locks the aggregate into the cell walls and creates the interlocking structure that resists vehicle loads. You should see the overfill settle down level with or slightly above the cell walls.
Add more aggregate to any low spots and re-compact.
Step 6: Install Edging (1 hour — optional)
For a clean, professional border, install BaseEdge HD steel edging along your driveway sides. Stake the edging into the ground at 3′ intervals.
Edging prevents aggregate from migrating off the driveway edges over time and creates a defined visual boundary between driveway and lawn.
Trim or bury any excess geotextile fabric along the edges.
Common Installation Mistakes to Avoid
- Skipping the geotextile layer: Without fabric separation, soft soil eventually migrates up into the geocell and compromises the system. This is the most common cause of premature failure.
- Under-filling cells: Cells filled only halfway don’t provide adequate load distribution. Fill level with the top, plus overfill.
- Using round river rock: Round stones don’t interlock. Use angular crushed stone (¾″ minus or crusher run) for proper aggregate lock.
- Skipping compaction: Uncompacted aggregate settles unevenly under traffic. Rent a plate compactor — it’s worth the $60–$80.
Time Estimate for a Typical Project
A 500 sq ft driveway (10′ × 50′) typically takes 8–12 hours of labor spread across a weekend. Day one: excavation, grading, fabric, and geocell installation. Day two: aggregate filling, compaction, and edging.
Two people working together can cut this time by 30–40%.
Why Does My Gravel Driveway Keep Washing Out?
Gravel driveways wash out when water flows across the surface faster than it can drain through the aggregate. This happens most often on sloped driveways without proper crowning, driveways with compacted or clay-heavy subsoils that don’t absorb water, and driveways where loose gravel has nothing holding it in place.
The solution is creating a permeable surface that drains vertically while physically confining the aggregate so it can’t be carried away by surface flow. Geocell ground grids accomplish both — water passes through the cells while the honeycomb walls hold stones in position.
What Is the Best Material to Stop Driveway Erosion?
The most effective material combination for permanent driveway erosion control is a geocell grid system filled with angular crushed stone, installed over geotextile fabric. This combination addresses subgrade separation, lateral confinement, and drainage simultaneously.
BaseCore HD™ geocells are manufactured from heavy-duty HDPE plastic designed for vehicle traffic loads. Unlike thinner geocell products, the HD variant includes reinforced cell walls that won’t collapse under repeated tire pressure. For most residential driveways, 3″ BaseCore HD™ provides adequate depth; for truck traffic or heavy loads, upgrade to the 4″ version.
How Deep Should a Geocell Driveway Base Be?
For standard passenger vehicles and light trucks, a 3-inch geocell depth provides sufficient load distribution and erosion resistance. For driveways that handle heavier vehicles — work trucks, RVs, trailers, or frequent delivery traffic — a 4-inch geocell depth offers additional structural capacity.
Backyard Bases offers both 3″ BaseCore HD™ and 4″ BaseCore HD™ specifically for driveway applications. If you’re unsure which depth fits your traffic patterns, call 888-897-2224 — the team can help you size your project based on expected loads.
Conclusion
Driveway erosion isn’t something you have to keep fighting every year. The problem traces back to three engineering failures — weak subgrade, unconfined aggregate, and poor drainage — and the solution addresses all three at once.
With BaseCore HD™ geocell, geotextile fabric, and proper installation, you can build a driveway that drains, stays flat, and holds its gravel in place through every rainstorm, freeze-thaw cycle, and vehicle pass. It’s a single-weekend project that eliminates the recurring cost and frustration of traditional gravel driveway maintenance.
Order your BaseCore HD™ driveway kit at backyardbases.com/order-now or call 888-897-2224 to discuss your project with a ground stabilization specialist.
Frequently Asked Questions
Can I install geocell over my existing gravel driveway?
Yes, but only if your existing base is stable and well-drained. Remove loose or contaminated gravel, compact the remaining material, install geotextile fabric, then place BaseCore HD™ on top. If your existing driveway has significant soft spots or mud pumping, you’ll need to excavate to stable soil and start fresh.
How long does a geocell driveway last?
BaseCore HD™ is manufactured from UV-stabilized HDPE plastic with a projected service life of 50+ years. The geocell structure doesn’t degrade, rust, or rot. Aggregate may need occasional top-dressing every 5–10 years depending on traffic volume, but the underlying grid system remains permanent.
Will a geocell driveway work on slopes?
Yes — geocell actually performs better on slopes than loose gravel because the cells physically hold aggregate in place. For slopes exceeding 10%, consider using the 4″ BaseCore HD™ depth and adding anchor stakes to prevent panel shifting during installation. Proper grading that directs water off the surface remains important.
What type of gravel works best with geocell?
Angular crushed stone in the ¾″ minus or crusher run size range works best. Angular particles interlock within the cells, creating a stable, load-bearing surface. Avoid round river rock or pea gravel — smooth stones don’t interlock and provide less stability. See our gravel types and sizes guide for detailed recommendations.
Is a geocell driveway cheaper than concrete or asphalt?
In most cases, yes — both in upfront installation cost and long-term maintenance. A DIY geocell driveway eliminates contractor labor costs entirely. Unlike concrete, there’s no cracking, no resurfacing, and no drainage retrofits needed. Visit backyardbases.com/order-now for current kit pricing based on your driveway dimensions.
This article is for informational purposes only. The guidance provided reflects Backyard Bases’ product documentation, published build guides, and general ground stabilization principles. Soil conditions, climate, drainage, and load requirements vary by property — consult Backyard Bases or a qualified contractor for site-specific recommendations. For current product information, sizing help, and pricing, visit backyardbases.com or call 888-897-2224.
