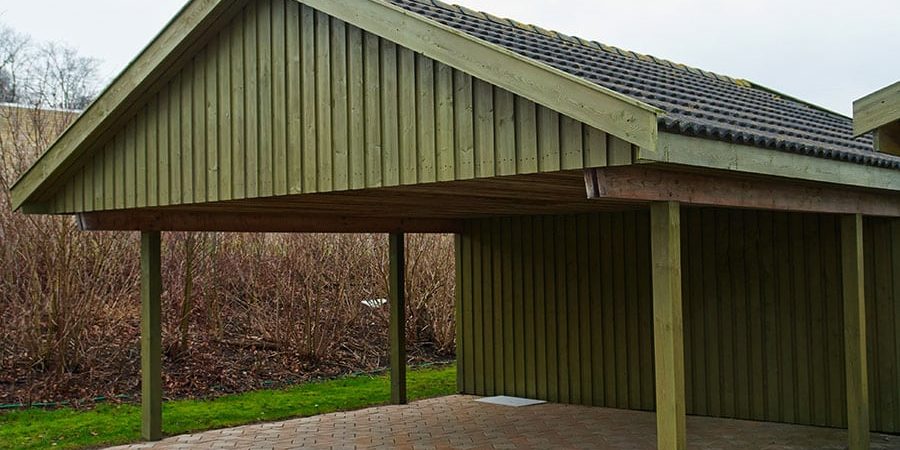
Carports can be a sturdy shelter for your extra vehicles and equipment, especially if it’s sitting on a durable foundation. This backyard addition can extend your family’s parking area and make plenty of room for guests.
The only trouble is how expensive concrete slabs are and the continual rising of material costs.
Unlike what the manufacturer says, this base is not the only answer for your carport. Our team doesn’t want you to regret pouring concrete in your backyard if you’ve already spent thousands on your hot tub or other project foundation.
We’re going to share other DIY carport foundations that won’t break your bank. Then, you’ll learn how to build them yourself with 6 easy steps.
Considerations for Building Your Carport Foundation
Just like building a shed or another portable building, you must consult the county. Some have local ordinances prohibiting you from assembling a carport on certain areas.
You may already have a spot in mind that’s beyond property lines and not even know it. Or there could be power lines running underneath that you wouldn’t know without calling 811.
It’s also worth noting that your carport location may not be worthwhile if water runs down that area. Over the years, erosion will create potholes, ruts, and pooling that deteriorate its lifespan.
Overall, you should check with the local government before constructing the carport so you don’t get into any legal trouble. We want to prevent you from spending thousands unearthing the sturdy structure you installed.
Types of Carport Bases
Depending on the foundation you choose, you’ll be paying more or less on carport materials and labor.
Some are easily accessible through a local aggregate company or have convenient shipping. However, other carport bases feel impossible to find while construction and building materials are in high demand.
Not only should you invest in an affordable carport foundation, but also a lifelong base. It should last your family years to come, so you don’t have to worry about cracking or uneven ground.
| Geocell | Concrete | Asphalt | Gravel | Dirt | |
| Permeable | Yes | No | Sometimes | Yes | Erosion |
| Strength | Strong | Strong | Medium | Weak | None |
| Longevity | Durable | Durable | Short-term | Short-term | Unreliable |
| Installation | Easy | Expert | Easy | Easy | None |
| Maintenance | None | Check for cracking | Check for cracking | Reseal every 2-3 years | Erosion |
| Price | Cheap | Expensive | Cheap | Cheap | None |
| Sub-Base | None | Yes | Yes | None | Weak soil |
| Settle Time | Drive instantly | 28 days | 3 days | 7 days | None |
Installing a Carport Base Using Geocell
For this carport foundation DIY guide, we’re explaining how to install a geocell base. They are the best base on the market for all your backyard projects and are approachable if you’ve never laid one before.
As a durable and permeable option, it holds the strength of concrete while retaining the drainage of gravel. You can get it at a low price without long delays like other building materials.
There are 6-simple steps for installing a carport foundation with geocell. Thankfully, you can easily do this work with your kids or friends without hiring any specialists.
Plus, there is no need to purchase any heavy equipment. Simply use what you have at home to install a DIY carport foundation
Materials
- Geocell panels
- Textile fabric
- Geocell clips
- Gravel (angular crushed gravel that’s ½” or smaller)
Tools
- Rebar stakes
- Geocell caps
- Shovel/rake/tractor
- Plate or hand compactor
Step 1: Prepare the Carport Base
After receiving county permission, choose the best location for your carport. You’ll take out any large objects, such as debris and rocks, and dig a 4-5” layer to fit the geocell panels.
Step 2: Install Geotextile Fabric
We recommend protecting infill material from sinking into the subgrade by laying geotextile fabric. Simply roll the fabric over the prepared carport ground and cut any excess away.
Step 3: Secure Geocell Panels
You’ll expand the geocell product and stake each side on parallel ends of the foundation site. Our team can custom design panels that fit your carport area, or you can cut the extra with a utility knife.
Step 4: Connect Trim Panels
Connect each HDPE panel section with geocell caps and clips. This gives lateral strength across the entire base and equally distributes weight when a car drives over.
Step 5: Fill Geocell Panes
With a geocell carport base, each cell requires infill material for maximum strength. Gravel, dirt, and on-site material is the cheapest material and still withstands the pressure of daily driving cars.
Step 6: Compact Your Surface
Lastly, compact the infill material into the geocell panels for a complete DIY carport foundation. Our team has seen past clients rent out a hand compactor for a day and move across the base to flatten any uneven spots.
Permeable & Sturdy Carport Foundation
If you followed our DIY foundation guide, you now have a carport base that will last 75+ years with geocells. This material choice is more cost-friendly and is both permeable and durable.
Your budget and an easy-to-install option may be the first priority, but it doesn’t make sense if you spend thousands more down the road. Gravel and asphalt are common options we see that cost more in the end but are enticing by the low ticket price.
We’ve utilized geocell foundations for carports, sheds, driveways, and all kinds of backyard projects. Our team would be glad to hear more about your carport idea and answer your questions about geocell.
Give us a call at (888)-897-2224 and we’ll respond shortly.
